I can certainly help you with refining the text based on the suggestions. Here's an updated version:
Introduction
Guarding against out-of-memory errors is crucial for applications, and one effective method is to add swap space to your server. This guide walks you through the process of adding a swap file to an Ubuntu 22.04 server.
What is Swap?
Swap is a dedicated portion of hard drive storage reserved for the operating system to temporarily store data when it exceeds the capacity of RAM. Although writing to swap is slower than RAM, it serves as a safety net when RAM is depleted, preventing out-of-memory errors.
Step 1 – Checking the System for Swap Information
Before starting, check if your system already has swap space:
sudo swapon --showIf there's no output, your system currently lacks swap space.
Verify using the free utility:
free -h
No active swap is indicated in the output.
Step 2 – Checking Available Space on the Hard Drive Partition
Ensure sufficient disk space by checking current usage:
df -h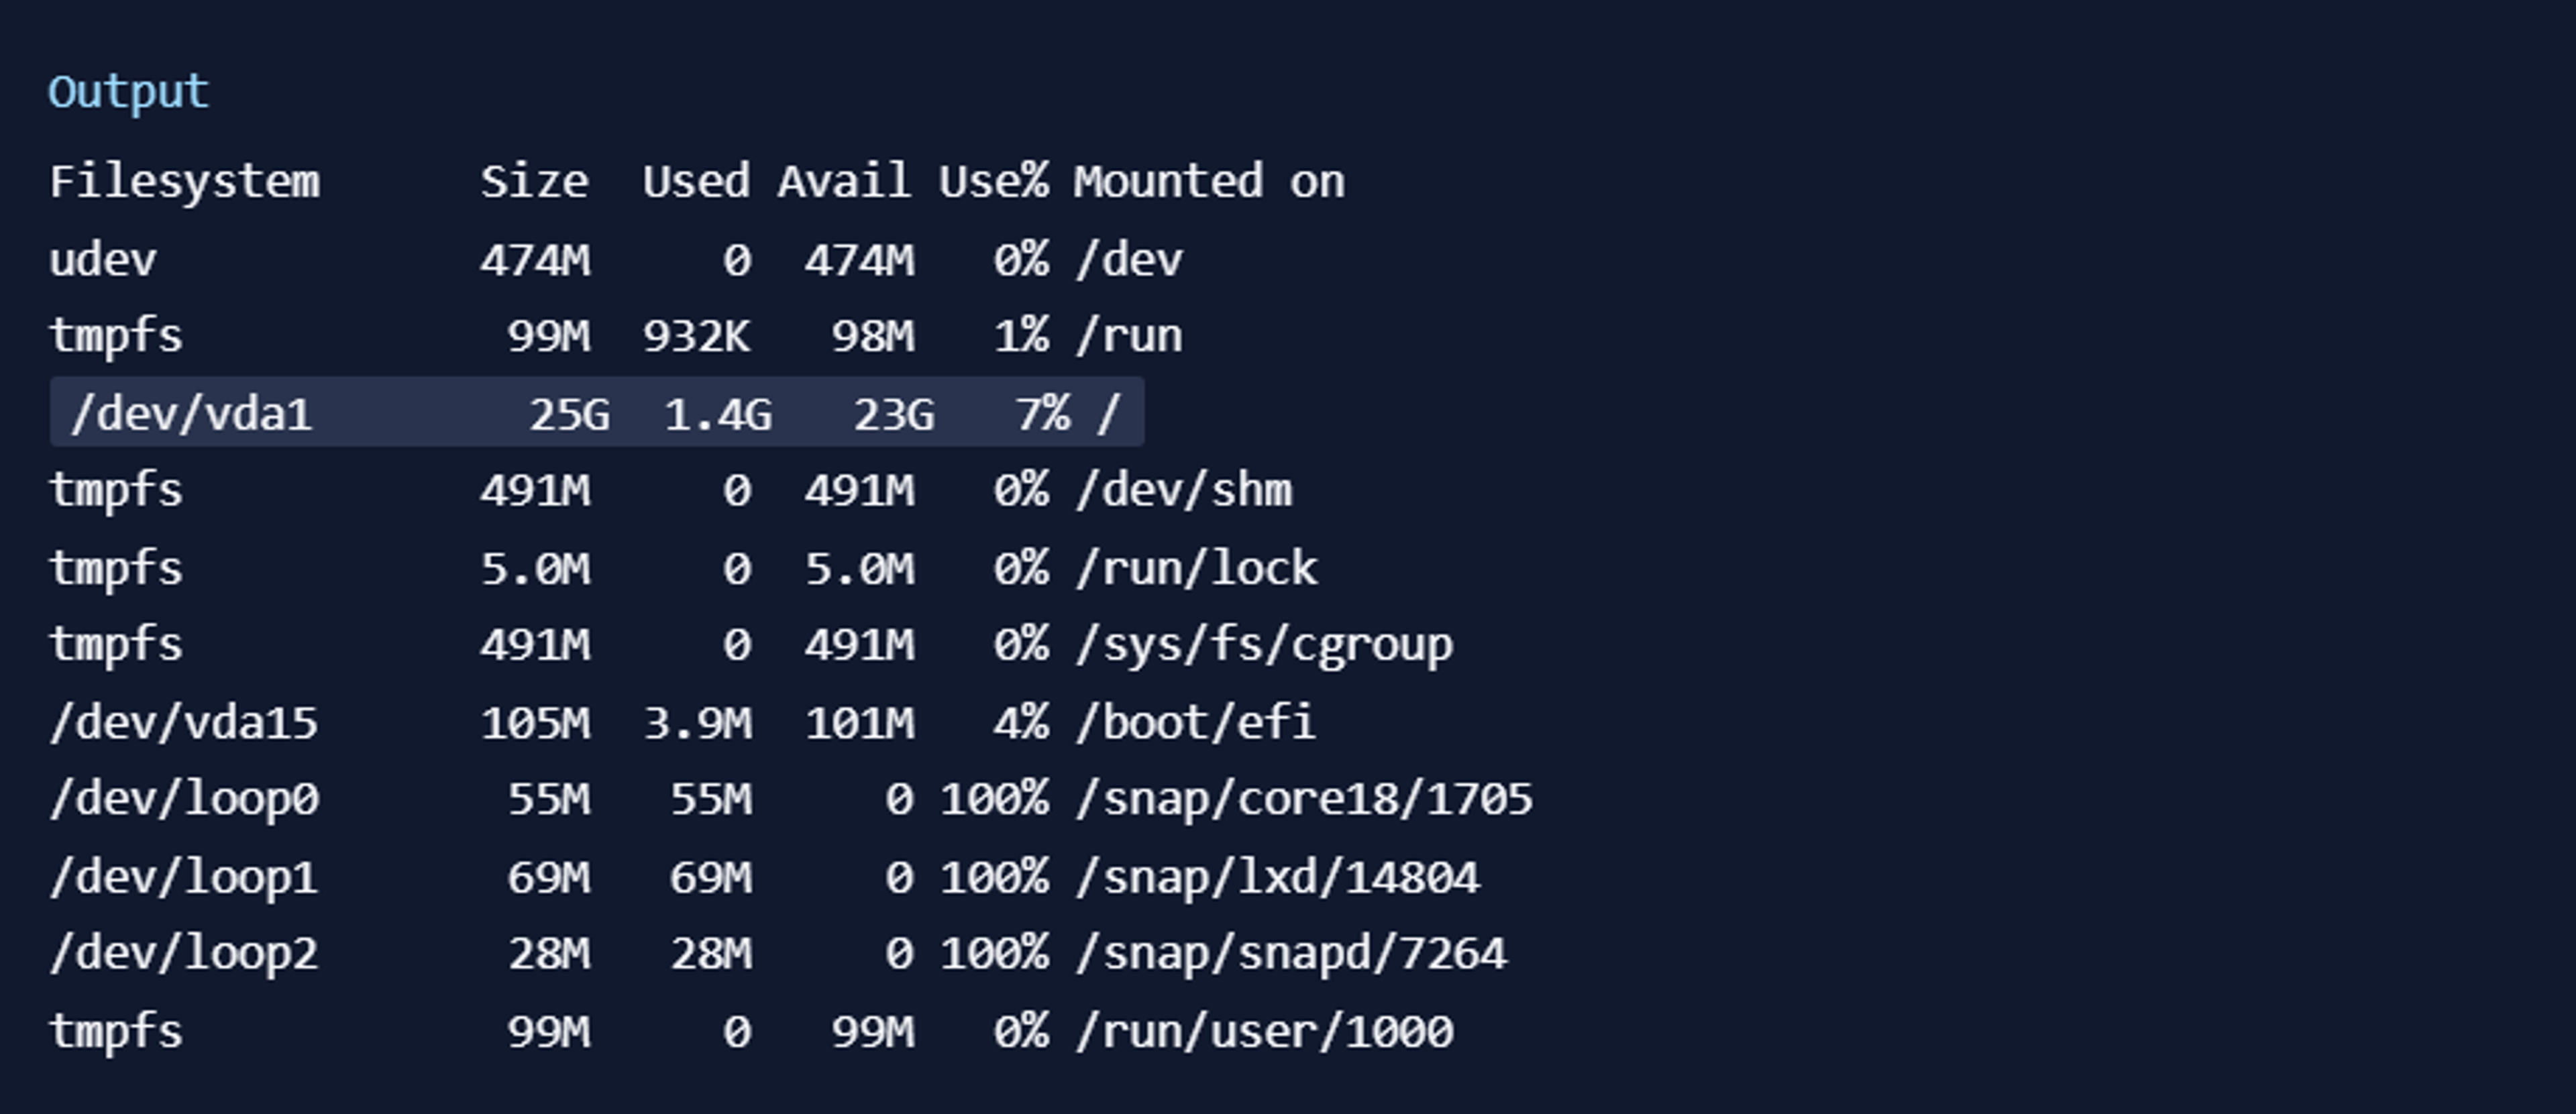
Look for available space on the device with "/" in the Mounted on column. A rule of thumb is to allocate swap equal to or double the RAM size.
Step 3 – Creating a Swap File
Create a swap file using the efficient fallocate program. For example, on a server with 1GB RAM:
sudo fallocate -l 1G /swapfileVerify the reserved space:
ls -lh /swapfileStep 4 – Enabling the Swap File
Secure the swap file permissions so that only root user can modify it:
sudo chmod 600 /swapfileVerify permissions:
ls -lh /swapfileMark the file as swap space:
sudo mkswap /swapfileEnable the swap file:
sudo swapon /swapfileVerify availability:
sudo swapon --show
Use free utility for confirmation:
free -h
Step 5 – Making the Swap File Permanent
Ensure the swap file persists after a reboot by adding it to /etc/fstab:
sudo cp /etc/fstab /etc/fstab.bakAdd the swap file information:
echo '/swapfile none swap sw 0 0' | sudo tee -a /etc/fstabNext we’ll review some settings we can update to tune our swap space.
Step 6 – Tuning your Swap Settings
Adjust the swappiness parameter-
View Current parameters:
cat /proc/sys/vm/swappinessSet swappiness (e.g., 10):
sudo sysctl vm.swappiness=10Make the change persistent:
echo 'vm.swappiness=10' | sudo tee -a /etc/sysctl.confAdjust the vfs_cache_pressure-
View Current parameters:
cat /proc/sys/vm/vfs_cache_pressureSet vfs_cache_pressure to 50:
sudo sysctl vm.vfs_cache_pressure=50Persist the change:
echo 'vm.vfs_cache_pressure=50' | sudo tee -a /etc/sysctl.confAt the bottom, add the line that specifies your new value:
Save and close the file when you are finished.
Conclusion
Adding swap space provides a safety net against out-of-memory issues. Optimize application configurations or consider a server upgrade if encountering frequent OOM errors.
Happy Coding!

Naman Arora
Technical Author with a passion for translating the complexities of software, computers, and emerging technologies into accessible and engaging content. Armed with a background in computer science, I blend technical expertise with a flair for effective communication in my writing. Join me on this tech-savvy journey as we explore coding languages, unravel the nuances of software architecture, and stay informed about the latest tech trends. Let's navigate the digital frontier together!